Description - Looking for a gym mat that can handle your beast mode workout? Look no further than our 4' x 6' Premium Mats! Made from 100% recycled rubber and vulcanized for maximum durability, these mats are as tough as they come. The vulcanization process creates a stronger, more durable material that can withstand heavy use and exposure to the elements, making these mats a premium choice for any serious gym-goer. Whether you're deadlifting, doing burpees, or just feeling extra sweaty, our mats can handle it all. Plus, with their smooth top and bottom surfaces, you won't have to worry about any unsightly bumps or odors. Don't settle for a wimpy mat that can't handle your gains – upgrade to our Premium Mats today and experience the difference!
Material - Made from 100% recycled rubber vulcanized into premium high density mats. Color options have a 20% EPDM color fleck added to the surface.
Size - 4' x 6'
Thickness - Available in 8mm and 3/8" (10mm).
Weight - The 8mm thick mat weighs approx. 47 lbs and the 3/8" thick mat weighs approx. 60 lbs.
Recommended Uses - Our 4' x 6' Premium Mats have demonstrated their versatility in a wide range of commercial and residential settings. Our discerning clientele have selected these vulcanized gym mats for use in diverse environments such as hockey arenas, schools, commercial gyms, hotels, ski resorts, fitness centers, locker rooms, pet care facilities, horse stalls, and residential home gyms.
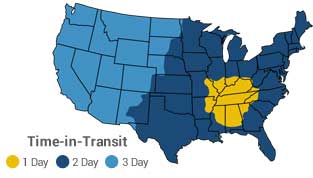
In Stock - Ships between May 2 - 3
Easy Maintenance for 4'x6' Premium Mats
- Vacuum loose dust, dirt, or debris from the rubber surface as needed.
- Occasionally damp mop the rubber mats with a mild soap and water mixture. We recommend using Dawn dish detergent and/or Tide laundry detergent.
Note: Avoid using solvent or oil-based cleaners like Pinesol, Lysol, Murphy's Oil Soap, WD40, or paint thinner, as they can damage the flooring over time.
For more detailed cleaning instructions and commercial cleaning instructions, click here.

