Description - ProGame Outdoor Basketball Court Tiles give you the home-court advantage to train and compete without having to leave your driveway. The ProGame court kits snap together easily with the weight of your foot to create a seamless home basketball court in no time. ProGame tiles are non-slip and come with a gripped texture, locking edges, and vented surface for easy drainage.
These outdoor basketball court kits are UV-stable and are built to last. Tiles snap together easily for quick installation and can be easlily removed for transport. To mark game lines you may use our Game Line Paint Kits but you may additionally use tape to mark game lines.
Material - Tiles are made from impact-resistant durable polypropylene plastic. These color-fast tiles are constructed with high-quality polypropylene (extremely durable hard thermoplastic polymer) available. This ensures colorfastness, durability, and chemical resistance in each and every tile.
-
20' x 24' - 17' Free throw line, 204-tile key with 276-tile court.
-
30' x 30' - 17' Free throw line, 204-tile key with 696-tile court.
-
50' x 42' - 19' Free throw line (Meets NCAA Standard), 228-tile key with 1872-tile court.
Tile Size - 12" x 12"
Thickness - 5/8"
Kit Weight -
20'x 24' - 490 lbs
30' x 30' - 630 lbs
50' x 42' - 1260 lbs
Recommended Uses - ProGame Outdoor Basketball Court Kits are great for use in driveways or any area where you would like to have a professional and durable outdoor basketball court.
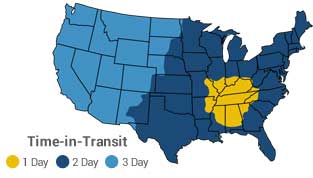
In Stock - Ships between Jul 30 - 31
ProGame Sports tiles are easy to maintain. Cleaning of these flooring tiles typically includes:
- Vacuum any loose dust, dirt, or debris from the tiles.
- Hose down the floor and let the self-draining design allow for the dirt and debris to be swept away.
Outdoor Basketball Court Kits are easy to install. Installation of these floor tiles typically includes:
- Clean your subfloor so that it is free of all dirt, dust, grease, or other foreign material.
- When installing the ProGame tiles, we recommend starting in one corner of the room and working your way out in either direction.
- If your flooring is going up to a wall, make sure the female side (loops) of the tile is facing away from the wall.
- After placing the tiles in a perpendicular pattern, proceed to fill the rest of the area with tiles to your predetermined size and design.
- When you come up to an edge, wall or object, measure the area and cut the tiles with a tile cutter or table saw.
- When trimming the tiles into place, make sure you leave about a 3/4” space between the tiles and the outside of the court or near a while to allow for expansion and contraction of the floor.
- Once the tiles are in place, you can then snap in the edge pieces.
Game Line Application:
- Make sure when applying painted game lines that you use painter’s tape or 3M 2060 tape to outline the lines that need to be painted. For painted game lines, use a two-part polyurethane paint.
Note: For proper rubber underlayment installation, please
Click Here.

