Description - Create the perfect multi-purpose gym floor with our Indoor Court Tiles. Made of impact-resistant polypropylene, these durable tiles ensure colorfastness, durability, and chemical resistance. These hard plastic tiles are easy to install and maintain and are great as a basketball court, volleyball court, badminton court, and more. Since these tiles are more durable than wood flooring, you don’t need to use a gym floor cover. These tiles are water-resistant, stain-resistant, and mold/mildew resistant. To optimize bounce and comfort under your new sports floor, we recommend installing these tiles over our rubber underlayment. A 7-year warranty backs our Indoor Court Tiles.
Specs -
| Material |
High-quality impact-resistant polypropylene |
| Color |
Assorted |
| Size |
12"x12" |
| Thickness |
Approx. 3/8" |
| Weight per tile |
Approx. 0.625lb |
| Made in USA |
Yes |
| Application |
Indoor |
| Drainage |
No |
| DIY-Friendly |
Yes |
| UV Stable |
No |
| Warranty |
7-year |
| Mold and mildew resistance. |
Yes |
Recommended Uses - Our Indoor Court Tiles are a great flooring option for indoor basketball courts, volleyball courts, badminton courts, and more. Not recommended for pickleball or tennis.
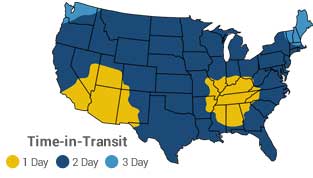
In Stock - Ships between Jul 30 - 31
Indoor Court interlocking tiles are easy to maintain. Cleaning of these multiuse tiles typically includes:
- Vacuum or sweep any loose crumbs, dust, or debris from the sport tiles when necessary.
- Hose off or damp mop the sport floor tiles with a mild soap and water mixture for tough or caked-on dirt and/or stains.
Indoor Court Tiles are easy to install. Installation of these floor tiles typically includes:
- Clean your subfloor so that it is free of all dirt, dust, grease, or other foreign material.
- When installing the tiles, start in one corner of the room and work your way out from there.
- If your flooring is going up to a wall, make sure the female side (loops) of the tile is facing away from the wall.
- After placing the tiles in a perpendicular pattern, proceed to fill the rest of the area with whole tiles to your predetermined size and design.
- When you come up to an edge, wall, or object, measure the area and cut the tiles with a tile cutter or table saw.
- When trimming the tiles into place, make sure you leave a 3/4” space between the tiles and the outside of the court or near a while to allow for expansion and contraction of the floor.
- Once the tiles are in place, you can then snap in the edge pieces if you purchased them.
Game Line Application:
- Make sure when applying painted game lines that you use painter's tape or 3M 2060 tape to outline the lines that need to be painted.
For painted game lines, you will use a two-part polyurethane paint.

