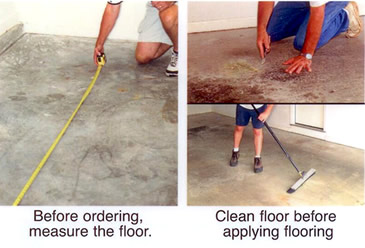
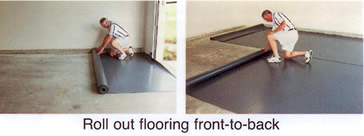
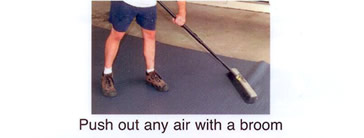
Pre-InstallationMeasure floor to order proper amount of flooring InstallationStep 1 - Clean Floor. Make sure garage floor is clean, dry, and free of any objects. Sweep dirt out of garage and remove any lumps or excess cement/debris that might cause a bump on the surface. Step 2 - Unroll Floor. Position flooring at front of garage, one roll at a time. Roll flooring out front-to-back and position carefully Use a broom to push out any air underneath flooring |
|
|
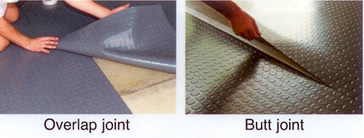
Step 3 - Joint & Cuts. When installing multiple rolls wall-to-wall, you can:
Butt-type seaming guidelines. Fold back edge of roll #1 and wipe clean. Attach tape along roll #1's edge (leaving 2" of tape exposed) and fold back into position as shown. Fold back roll #2 and wipe bottom edge clean. Carefully align along edge of roll #1. Do not stretch mat or tape when applying. |
 |
 |
|
| Let the flooring "float" between exterior walls to allow for expansion and contraction. | 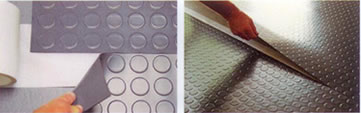 |
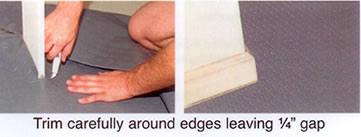
| NOTE: For custom fit, always allow product to relax in place before trimming around corners and edges.
Step 4 - Trim Trim floor to fit around poles, boards, etc. using utility/rug knife or scissors. Trim edges along exterior walls leaving 1/4" gap to allow for expansion/contraction. |
 |
| Optional - Taping After product has been allowed to relax in place, if you choose to hold down the edges or seams between two floor protectors, we recommend using indoor-outdoor carpet tape or 3-M brand 80 Rubber & Vinyl Spray Adhesive | 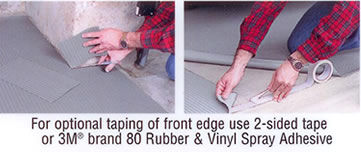 |
 |
|
-
 64,550+ Verified Reviews
-
 Over 200 Million Sqft
 -
 30 Day Money Back
 -
 Price Match
 -
 Free Samples